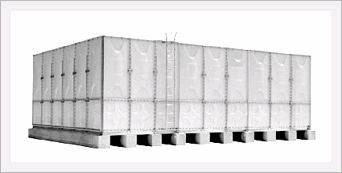
GRP Water Tank
1. Scope
Water and air are indispensable for our life. Our purpose here today is to install a tank to store this valuable water. Regardless of tank types, it is most important to prevent water leaks after the completion of the tank.In order to prevent any leaks, it is essential for you to follow, carefully and closely, the guidelines and recommendations made by Baegkwang Platech Co., Ltd.This guideline is a product of continuous test and studies on the installation of GRP sectional water tanks. As a result, unless you follow the rules described here, dreadful accidents, due to leaks or cracks, may occur. Therefore we strongly recommend that you consult this guide whenever necessary when assembling this tank so as to build a flawless tank.
2. Construction crew safety guide lines
You need to keep in mind below advice during the full process of the tank installation.
You need to keep the tank as clean as possible during the installation, as the water tank is to store human drinking water.
The tank has durability that will not be undermined as long as there is no natural disaster.However, you need to study and follow the guidelines to maximize this trait.
You need to pay close attention not to incur any damage on any part of the tank.
The crew assembling the tank must follow safety rules to prevent any accidents. It is advisable that the director of the installation project remind the crew of these recommendations aloud tomake sure the entire team is aware of them.
Take care not to fall when you work on the tank roof.
You should not touch or step on any wires or steel bars littering the work site to avoid an electric shock. If you want to remove them, contact the engineers concerned that are sent by the project owner.
If electric equipment is used, check in advance for the possibility of electricity leaks such as from the power supply, receptacle and transformer.
If the floor of the work site is wet or it rains, you must not do any installation.
Proper protective eyewear should be used when working is strong sunlight.
Flammable material can not be stored inside the tank. Such materials need to be stored in aseparate storage place under continuous supervision.
If the water tank is to be installed on a high roof top area, you should pay close attention to prevent the panels falling which can damage to life and property.
You need to deal with all the parts carefully because any scratch or slight corner dent during transfer or assembly can cause leaks. Ahead of installation, it is highly recommended that youbecome familiar with the reason water leaks occur.
3. Supervisors duties and obligation
The supervisor needs to confirm whether the installation process is following this installation guide.
It is essential for the supervisor to frequently check the installation safety.
The supervisor has to check and confirm the panel and accessories quantity when the goods arrive at the installation site.
The construction of a water tank is unique, given the fact that orderly putting the parts together can complete it . As partial assembly is impossible, you need to check whether the work is done properly during every stage of the assembly process..
If you find any defect in the parts during the installation process, you need to stop the construction right away. Then you should report it to Beagkwang Platech Co., Ltd. which will takeadequate measure to address it. During the process, you should prevent workers from replacing them with other manufacturer’s part.
If the installation is completed, you need to fill up the tank full. Then, the project owner,constructor, and supervisor should co-operatively perform the test for leaks. And the confirmed test results need to be reported to the related department.
4. GRP panels and related parts check-in
If the tank parts are arrive at the work site, the person-in-charge should promptly receive and check both the packing list and invoice to determine whether the parts are correct. Also you can use ‘Check List’ which is attached inside of the container door.If there is any discrepancy between the packing list and received products, you should contact,within 24 hours, the shipment department of the factory.
5. The treatment and Storage of the products
The parts are so heavy that it is recommended that a folk-lift be used to unload the products from the truck. In addition, the products need to be treated carefully in order not to cause any shock or damage. You need to be especially careful not to make a corner dent.
If you want to stack the GRP panels, the same type of panel should be in each stack. Besides,you need to load them up carefully so not to cause any damage or deformation.
All the construction material should be stored in a separate storage house while protected from loss. Pay special attention that the sealing tapes are kept in a dehumidified place
6. Process to build the water tank
1. Foundation check
2. Assembly of base skid and anchor bracket
3. Horizontal check up and adjustment
4. Attachment of sealing tape
5. Bottom panel assembly with bolt set
6. Crude assembly of side panel
7. Assembly panels with bolt set
8. Crude assembly of reinforcement
9. Assembly of roof panel
10. Complete put together of side panel
11. Complete tightening of bolt set
12. Put together of internal and outer accessories (Include nozzles)
13. Installation of anchor bolt
14. Cleaning in and out of the water tank
15. Check up completion
16. Test on water tightness
17. Finish
-1. Foundation check
The foundation should be done by the construction project owner.
Once the capacity of water tank is determined, the owner will be provided with the drawing of the concrete foundation.
Check the foundation and set up an installation plan before building the tank.
The maximum distance between foundation works is one meter and the joint of foundation channel required a foundation pad.
In order to ensure the space for installation and maintenance is adequate, at least 600mm length place is required as the above shown thing, while proper width of foundation pad should be 400mm.
6-2. Foundation frame and anchor bracket assembly
1) The specification of foundation frame according to the height of water tank
Tank height
Shape and Size (Main Frame)
Less than2.5mH
Between3mH ~ 6mH
2) Required parts
Base bracket 7575Z
Anchor bolt bracket
3) Assembly Process
Arrange the parts of foundation frame in order.
Other attached parts, bolts and nuts also should be in order.
Roughly assemble them with hands.
Assemble the bolt (M14X40mm) while checking the length of diagonal line. The length of diagonal line L1 has to be equal with L2.
After putting together the bolts, adjust the frame to the horizon referring to the following adjustment method.
6-3. Sealing tapes attachment
A Panel
The panel on which the tape is applied should be cleaned of any dirt. Especially the attached surface.
The cleaning cloth should be free of oil and wax.
The attachment surface should be dried of any moisture.
The bolt holes also need to be cleaned of any dirt A. dirt.
The protective strip should be removed right before the assembling process.
The location to use sealing tape is shown in the following diagram.
The end side of the sealing tape should be over lapped by about 50mm (as shown in the diagram)
Any tape joints, where another tape needs to be connected due to short length of the first one should be over lapped by 50mm.
B Parts
The surface of bolt assembly at various GRP panel.
The surface where corner frame meets GRP panel.
On the joints of corner frame, the sealing tape should be applied up the upper and lower ends of each frame, after that, two connected frames need be completely fastened with bolts. (In thiscase, there should be no level difference between the two frames.)
C. Tie-rod brackets
Application method Apply two-layers of sealing tape onto the rackets.
Attachment part
Standard
Panels
50mm sealing tape
Corner frame & tie-rodbracket
120mm tape
6-4. Bottom panel assembly
A. Panel Assembly
Base frame has to be done before assemble the bottom panels.
Each panel is assembled with M10 X 45mm bolts.
In order to build a bottom panel with greater capacity, you need to build vertical row A, B, C first, then place those three assembled on the foundation panel in right order. And connect thewww.smctank.com -9- grptank naver.com boundaries like the above figures..
B. Precautions when assembling the bottom panel
As for the area where a panel meets another, there should be no level difference among the end sections of four-panel flange, and the bolts need to be fastened according to the fig. A.
Tighten bolts gradually in two separate stages, following steps described in the fig. B.
Bolts should be tightened with separate stages, otherwise cracking and leaks can occur due to the water pressure in case the tank is full of water.
The desirable location of tape over lapping is at cross-parts
In case where a bolt hole is not fit well, use a rosette as described in the fig. C, and then assemble the parts according to the fig. B..
Among bottom panels, confirm in advance the location where the drain panel is to be attached, and pay close attention to have the panel in proper location..
6-5. Side panel assembly
A. The assembly of side panel
Remove the protective shield from the sealing tape.
Put the panels together while checking the panel grades per parts and the locations of each bolt holes on the side panels.
Assemble the flange bar while putting together each panel.
The bolts should not be fully tightened. Fasten them only until the nuts do not move.
As you can see in the fig. 6-b, the side panels should be built with one side open.(ãÂÂ?· shape)The remaining side panel can be attached when you finish fastening inner stays and brackets.
Check the locations of nozzles that will be attached to the lower part of side panel in advance. If necessary, you should use 0.5X0.5 flat panels for the nozzle.
Side panels flange parts have to be flat during the tightening of bolts.
B. Flange bar assembly (0955Z & 0955ZP) . only use for side panels
1) The flange bar has to be put depend on the height of the tank as shown below figure.
* CAUTION : No flange bar on the bottom panels
* CAUTION : No flange bar on the bottom panels
2) Figure of flange bar
6-6. Processing of the assembly holes on each panel
Draw a centerline on the bracket, using a fixture
Mark the location of hole, in line with the cross line on the side panel and the fixture.
Drill a hole with a F 17mm drill.
6-7. Tie-rod assembly
Check that the tie-rod length is with the length of water tank dimension.
If tie-rod length is shorter, you can connect it with tie-rod connector.
Upper part for over 3m heightThis method applied to water tank height up to 2.5m.
Lower part for over 3m heightThis method applied to water tank height from 3m.
6-8. Roof panel assembly
The roof panel is to be assembled in the same method that you used for the bottom panel.
The bolts size used for each panel assembly is M10 X 45mm.
Do not put sealing tape at the roof panel. You can put sealant roof panel assembly part from outside of roof panel after finish assembly to prevent rain water and other dirt comes in.
The general caution for the bottom panel assembly can be applied to this panel.
Pay special attention not to incur damages when you work on the bottomed up panel. And during the outdoor construction, there can e safety accidents if some panels are blown by wind.
It is more convenient if the air-vent hole is built earlier than the assembly of panels.
6-9. Side panel complete assembly
One side panel was remained un-attached for the purpose of putting the inner reinforcements in and assembling of the roof panels. The remaining one is built like other plates.
6-10. Complete tightening of all bolts
Some parts of panel bolts and tie-rods are not fastened yet. In order to tighten all bolts completely,you need to be careful to follow the indicated orders below.
The bolts on the location “A” where panels cross should be fastened first. In this case, atechnician needs to be within the tank to synchronize the fastening of bolts with aperson outside.
After tightening “B”, assemble “C”
For the complete securing of part “a”, “B” and “C”, it is best to use two bolts.
After putting together part “A”, “B” and “C”, start assemble “A”->”C”, “A”->”B”, and “A”->”A” and remaining three side panels can be installed following in the same way.
Put flange bar on the proper place and assemble side panels and bottom panels.
As for the assembly of construct “T” part first, using two bolts.
Follow the procedure done on the bottom panel to complete the tightening of bolts on side and roof panels.
Last parts to be assembled are the corner fame and the side panel around corner.Pay close attention to assemble “a” and “B” parts evenly as indicated right.
Complete assembly of tie-rods. Refer to the attached drawing.
The assembly process of tank and foundation frame.
6-11. Inner and outer attachment (including nozzle) assembly
A. Ladder constructionBuild inner and outer ladders around the manhole.
B. Nozzle assembly
Nozzles are needed to connect drainage, inlet or outlet pipes and can be installed by the distributor on demand.
Check the attachment location, assortment and size of various nozzles in advance.
As for the flange type one mark the flanges after arranging two flanges face to face.(Leveling them vertically and horizontally.)
Select a hole saw that suits the size of the nozzle and cut the required hole.
In order to install the insulation panel, cut a hole which fits the size of the outer diameter of the flange on insulation cover. And then follow the procedure indicated at no.4)
Apply double layers of sealing tape as for flanges.
Use rubber head bolts (1460RD) to put nozzle together.
Especially for the attachment of flange type nozzles, the assembly holes on flanges should be leveled horizontally and vertically as shown in the right picture. Otherwise, the knobs can not stand in a right angle when the valves are applied.
6-12. Anchor bolts installation
It is necessary for the water tank constructor to exactly place and tighten the anchor bolts provided by Baegkwang Platech Co., Ltd. on the designed location of the foundation concrete pad.
Fasten the anchor bolts on the anchor bracket which were installed on the foundation frame during its assembly.
6-13. Cleaning water tank
A. Internal cleaning
Remove all remains like bolts and nut etc. Then clean the tank with soft detergent.
Use clean water to wash side and bottom walls two or three times.
During the cleaning, prevent any alien material from entering into the tank through the drainage.
B. External cleaning
Get lid of all the construction waste from the site.
After setting all the construction tools aside, keep the surroundings orderly..
7. Water tightness test
7-1. Test method
If the utility department has already installed water pipes, you can fill the tank while closing the valves for drain and outlet.
The water should be filled up to 250 ~ 300mm lower than the roof panel.
Let the exterior accessories of the water tank free from any drop of water.
Closely check nozzle, panel, bottom and corner parts.
The water tightness test should be done while there is a sunlight and fully filling up the water tank.
If the water tank is installed in the basement or inside of the building, enough lighting is required to check whether the tanks leaks or not.
If there is a leak, mark the area with red marker. The Identify any address the cause of water leaks.
7-2. How to deal with leaks
1) If there is a leak, find out the cause then deal with it as follows.
Cause
Problem and Solution
Remarks
1. Mistakes in the assembly of bolt sets
Check the completion of bolt tightening around leaking part.If it is not tightened well, use rosette to fully fasten it.
If the bolt has been broken due to its weak strength, it can lead to leaks. The bolt should be replaced.
2. Alien material in the sealing part
If the bolt on flanges was fastened with alien material like washer under the sealing tape. It can lead to leaks. In case the leaking is serious, you need to re-assemble the part.
If the leak is minor, you can address it with sealant. The sealant should be applied while the interior part of the tank is dry.
The sealantshould havestrongresistanceagainstcorrosion.
3. Leaks from panel cracking or pin holes
There can be leaks from pin hole or the corner cracking of GRP panel which can be dealt with sealant after draining the water from the tank.
2) Bolt breakAlthough the bolts and nuts look tightened, the invisible part can be broken. If it is the case, there will be a leak due to the water pressure when you fill up the tank fully.
GRP Water Tank

Description
Product Inquiry
Purchase Product Catalog
Payment & Shipping Conditions:
- Payment: We accept payment through Paypal Only.
- Shipping: We will ship the catalog once the payment is received. And you will be receiving the catalog with in 10 -14 busines days. Shipping might be delayed in due to international shipping conditions which is depends on the countries receiveing. In case hard copy of catalog is not available then we will ship the soft copy.
- Refund: We can refund the order before shipping process was initiated. Incase Catalog not available, we will make sure to refund the order.
- Note: This is a Catalog Produt.
Share GRP Water Tank in Social Media